
Mastering Centre Back Zips: Tips and Tricks for a Flawless Wedding Dress Finish
- reynaldorobinson
- Dec 19, 2025
- 9 min read
Installing a zip into the centre back seam of a wedding dress used to terrify me. Especially as the seam and zip will usually be seen by all during one of the most important parts of the ceremony: the exchanging of vows.
Admittedly it depends on the type of fabric: shiny satin being my nemesis, but if you follow this mini guide you should be able to ease any 'terror' misconceptions, relax and achieve great results - that is with a little practice on your toile - of this procedure we always recommend.
This guide will walk you through step-by-step instructions, highlight common mistakes to avoid, and share techniques for practising on toiles. Whether you’re sewing your own dress or 'just asking for a friend', you’ll gain confidence and skills to master this essential sewing technique.
For the advanced beginner the underpinning challenge lies in matching the colour zipper perfectly or as close as possible to the fabric and ensuring the stitching is invisible or very subtle. The last two points, in particular, require patience, practice and attention to detail, but the results are worth it.
Preparing to Install the Zip: Tools and Materials
Before you start, gather everything you need. Having the right tools makes the process smoother and helps avoid frustration:
Zipper ideally the correct length (usually 22-24 inches for wedding dresses)
Zipper foot and/or feet
Matching thread (choose a colour close to your fabric)
Sharp sewing needles and/or machine needles suitable for delicate fabric
Pins or fabric clips
Seam ripper (for corrections)
Iron and pressing cloth
Tailor’s chalk or fabric marker
Practice fabric: pieces similar in weight and texture to your dress fabric)
But firstly, let's consider the types of zip you could use for your dress. There are generally three for consideration. See diagram below.

Depending on the look you are going for The Chain Zip (A) and Coil Zip (B) teeth are covered by the fabric of the dress: both left and right centre backs meet together flush at the centre back to cover teeth or zip coil. Unless you want the zip to be a feature and make sure it's teeth are exposed. See picture below for inspiration and take a look HERE for a Step by Step guide on how to install an exposed zip. Alternatively you may want to install a Concealed/Invisible Zip (C). You'll find a Step by Step Guide HERE.

Step-by-Step Instructions for Installing a Center Back Zip
Zip Installation Prep: Things to do before you add a zip to your dress.
Here are a four little tips and tricks (from A - D) used before you add your zip to your dress. If you are unfamiliar with any of the techniques, then it's a good idea to practise them on your toile and/or scraps of fabric before attempting to do them on the real thing.

A. Reinforcing Centre Back Seam
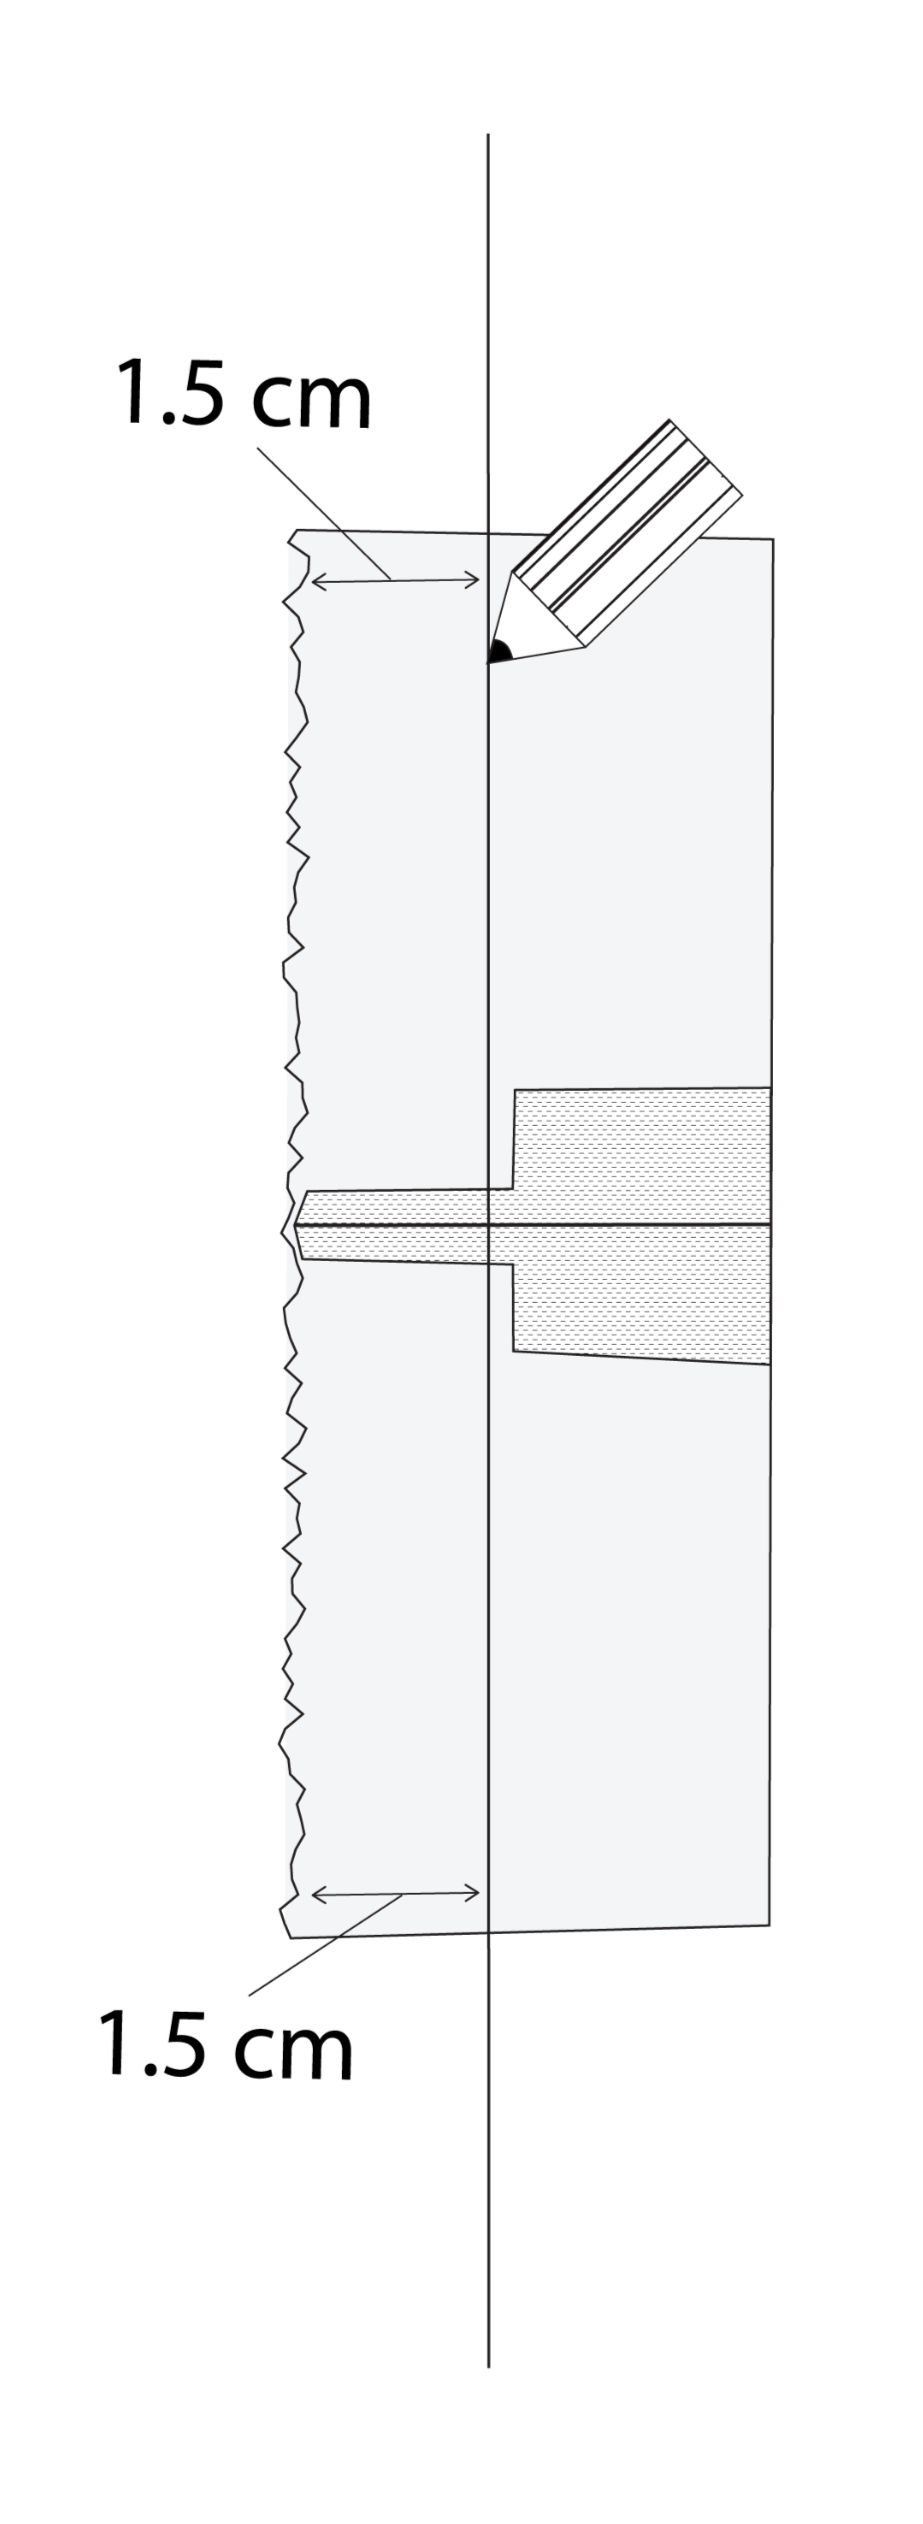
If your fabric is a little stretchy, thin or slippy - in simple terms it's a little unstable: it doesn't hold its shape well, then it may be advisable cut two strips of lightweight iron-on interfacing. The length should be about the total length of the zip plus 2.5 cm. The width should be about 2.5 cm - 3 cm. From neck edge or where the top of zip will be positioned, position and press interfacing strip into place, making sure that long length is flush to edge of seam allowance of Centre Back seam (see diagram below). This strip of interfacing will provide a little stability to the part of the Centre Back seam where the zip will be sewn into place.

B. Reducing Bulk
You may have to undertake this little step by step procedure if you have horizontal or cross seams, such as a yoke at the shoulder or where a bodice meets the skirt of a dress - waist seam.


C. Shortening Zip
You may have to shorten your zip if you require an odd size length: it can't be bought as standard from the shop. Firstly close zip, mark desired new length with tailors chalk, then measure 2.5 cm below desired new length and whip stitch several times over coil or chain of zip ( See Title Diagram: Zip Installation Prep: 4 Points). Cut off the excess zip and tapes. If the teeth are metal you may need a pair of pliers to help you remove them.
D. Closing Zip Above Top Stop

This is generally done when the dress has a placket - it keeps the area above the Top Stop of the zip together ensuring easier zip installation. As such, whipstitch tape edges together 6 mm above top stop (See diagram A above). Alternatively you could attach a straight eye fastener or hook and eye (See diagram B above) - but in the past I've found that this can add to bulk when installing the zip into the centre back seam so I think adding a fastener before installing a zip makes the installation process more difficult. Generally, I prefer to undertake the whip stitch procedure when I want a zip to sit nicely before I pin and tack it into position. Obviously, as you will see in the following step by step guide, when installing the zip, the left and right zip tapes are sewn separately - therefore, the whip stitching has to be undone before this can be undertaken.
Another tip is the use of masking tape when installing a zip. It does away with pinning and tacking/basting, an absolute boon when fabrics have a predisposition to show needle and pin puncture marks. Fabrics like low pile velvet, certain shiny satins, leather, leatherette and PVC - there's a thought...a wet-look PVC wedding dress! An important note is to make sure that the masking tape is used away from any stitching lines - so that you're not loosening stitches as you pull the masking tape away. Also remember that some masking tape adhesive is very tacky and can leave glue residue on finer, lighter coloured fabrics so it's often better to test the tape out: sticking down then pulling off, on a scrap of fabric before you apply the masking tape to the real thing.
Centre Back Zip Installation - Step by Step
Before you install your zip, unless your dress is fully lined, finish centre back seam to prevent it from fraying.
Step 1. Mark Seam and Position Zip

Position zip below neck edge of garment. This is the only variable that differs when installing a centre back zip. Where it is placed depends on how the neck edge will be finished. If using a facing place the Top Stop of the zip 10 mm below the seam-line of the garment. This will allow any extra space required for turning down the facing and attaching a hook and eye. If the neck edge doesn't require seam allowances being turned down - using a contrasting binding for example, place the Top Stop about 6 mm below neck edge seam line (see diagram above).
Then measure and mark exact length of zip opening - using the zip as your guide. Close seam by firstly backstitching at bottom of zip opening then stitching down towards hem. Above backstitching tack/baste, machine baste to neck edge.
N.B. all work is done from the inside of your dress, except for top stitching. Always work from bottom of zip to its top: the neck edge, both when tacking, sewing and top stitching. Keep zip closed at all times - with pull in its highest position, unless it is necessary to have zip open as in Step 3.
Step 2. Clipping CB Tacking

At the bottom of zip opening clip tacking threads. Then at 2.5 cm intervals (working towards neck edge) clip the bobbin thread only - this will enable you to remove tacking with ease. Press centre back seam open.
Step 3. Sewing Right Side Seam Allowance

Extend right-hand seam allowance. Place zip face down (see diagram above). Position Top Stop 6 mm or 10 mm from neck edge seam. Remember that the middle of zip: the middle of chain or coil, must sit in middle of centre back seam-line. I tend to pin then tack zip tape into place - this reduces chances of tape slipping and stretching when it's being sewn. Using a zipper foot, sew along stitching guide line on zip tape - in direction of Bottom Stop toward Neck Edge. Make sure the stitch length is set to the longest or stitch type is set to Machine Tack. At this point, if you have closed the zipper above the Top Stop, you may have to undo your whipstitching in order to manoeuvre your zip tape into position so that it's easier to stitch.
Step 4. Sewing Left Side Seam Allowance

Now close your zip and keep the pull tab up. As I do, you may want to whipstitch (again) above the Top Stop to keep everything even and in place. Extend left-hand seam allowance, position zip face down. Pin and tack into place - make sure zip is lying as smooth as possible. Position zipper foot to left of needle and long stitch/machine tack the left side zip. Remember from bottom of zip towards top: neck edge, following stitching guide line on zip tape.
Step 5. Turning & Tacking CB Seaming

Turn garment right side up - spread garment as flat as possible and ease out any ripples. From centre back seam hand tack across bottom and up one side. About 6 mm from CB seam line. Making sure that you catch garment seam, seam allowance and zip tape. Repeat for other side.
Step 6. Securing Zip Via Top Stitching


Change to a regular zip length, about 2.5 - 3. Begin at CB seam just outside of tacking (leave threads long), and topstitch through all layers: garment, seam allowance and zip tape. Be very careful not to sew through bottom stop of zip as this could break your needle. Take two or 3 stitches across bottom, pivot (see diagram Step 6a) and stitch towards neck edge (see diagram Step 6b).
Step 7. Finishing Off

Position zipper foot to right side of needle and topstitch remaining side in the same way as Step 6. Make sure to take the same amount of stitches across zip bottom (being careful not to sew through bottom stop), keep threads long and pivot - keeping needle in fabric. With a sharp needle, thread and pull through long threads to wrong side knot and tie and snip to make short. Remove any hand tacking, check zip opens and closes properly without obstruction. Press very gently with steam (depending on fabric) and a pressing cloth.
Common Mistakes to Avoid
Not using an invisible zipper foot: This foot is essential for stitching close to the zipper teeth without catching them.
Skipping tacking/basting: Without basting, the zipper can shift during machine sewing, causing uneven seams.
Not pressing seams: Pressing keeps the fabric flat and helps the zipper lie smoothly.
Trimming zipper too short: Always leave a little extra length to avoid zipper malfunction.
Ignoring fabric type: Some fabrics need stabilising before zipper installation to prevent puckering (see Zip Installation Prep - A. Reinforcing Centre Back Seam).
Practicing on Toiles: Building Confidence
Before working on your actual dress, practice installing zippers on toiles. Use fabric similar in weight and texture to your wedding dress. This practice helps you:
Get comfortable with the invisible zipper foot
Learn how to align and pin the zipper accurately
Understand how much seam allowance to leave
Perfect your stitching speed and accuracy
Try installing zippers multiple times on scraps. Each attempt will build your confidence and reduce mistakes when you work on the real fabric.
Tips for a Neat Finish
Use fine pins or fabric clips to avoid leaving marks on delicate fabric.
Sew slowly and keep your hands steady to maintain a straight seam.
Use a pressing cloth to protect fabric when ironing.
Check zipper alignment frequently during sewing to avoid shifting.
Trim loose threads immediately to keep the finish clean.


Comments